Showing posts with label transom. Show all posts

Sunday, April 29, 2012

Tomorrow!

Tomorrow is launch day!  This morning I trailered BELLE over to the boatyard, put the mast up (no problem for one person to do), and got her ready to launch on tomorrow's afternoon tide.  High tide  is about 6:30PM, but there should be enough water in the inlet where the launch will take place by 4:30PM or so.  Here are a couple of final "dry land" photos of the boat:

A coat of bottom paint ("Shark White") and a bunch of rigging details taken care of for launch.

With the mainsail laced to the mast (no mast hoops), I decided to leave the end of the boom down for the night and securely bundle the sail to the spars.  It's quite blustery today, with more wind expected overnight, so I thought it would be safer to do it that way.  Plus I don't have the topping lift in place yet...soon! 
I realize I've been remiss in reporting on the various final details of rigging, bottom paint, etc. I'll make up for it,  there will be photos, etc., of various aspects of the final work on the boat to come soon.  Stay tuned!

In the meantime, though, I'm hoping to have some nice photos of launch day here within a few days.  Wish me luck!


Saturday, March 17, 2012

BELLE waits patiently

BELLE is now in a storage shed, waiting for the sails to arrive.  Then comes rigging, bottom painting, and final details...

Very warm today, for mid-March in Maine, so now I wish I had ordered the sails a month earlier.

I'll be putting together a cover for the boat--she's only in this nice shed temporarily--so I bought a 12'-long 2x4 ridge pole and a tarp.  The black stuff on the coamings is foam pipe insulation (available at hardware stores).  It should protect the coamings from chafe once the tarp is on.  

Sails might come next week...I hope so!


À bientôt / until next time!

Friday, February 24, 2012

Deck hardware, seats, etc.

With the sails on order, there's just a few more things to take care of before launch day:

Time to bed down the plywood seat-locker tops.  I'm bedding them--rather than using epoxy--so that I'll be able to remove them later for any necessary repair/maintenance. I'm using goopy Life Caulk for the job.
This photo shows both seat-locker tops in place. 
With a second coat of finish paint applied to the deck, the jewelry--I mean hardware--can be bedded with old-fashioned Dolphinite.  Also time to install the slatted seats and floorboards.  The seats are screwed down to the cleats on the seat-locker tops shown above.  There's really just a handful of screws, so these seats will be easy to remove in the fall before wrapping up the boat for the winter.  (For now I anticipate storing the boat outdoors under a canvas tarp.)  They can then be varnished in my "workshop" (OK dining room) at my leisure.

After four coats of varnish (or was it five?), I flat-sanded the transom and put on one more coat.  The red cedar is really starting to look good.
With the mast temporarily stored in the boat--I just discovered the top end fits nicely in the sculling notch I cut in the top of the transom--I can take a breather to take care of some "real world" business...I start a new job on Monday!

In the above photo, note how the mast only overhangs the transom a few inches.   This is a benefit of going with a gaff rig--or lug rig, for that matter--with its relatively short spars compared to a marconi rig.  


I'm putting together a list of "Year Two" updates/changes for the boat, things I'm willing to put off a bit so I can go sailing this summer.  One thing on the list is the various hatches for the under-seat lockers.  I've got them cut out and rough-sanded, but they still need a bit of fussy work (including making a bunch of thumb cleats) that I think I'll put off at this point.  They'll make a nice winter project next year.   Ditto the canvas dodger and boom tent that I plan to make.  The dodger will snap onto the coamings at the forward end of the cockpit;  the boom tent will be a simple tarp tied down to various cleats on deck to keep rain out of the cockpit.

Well that's it for now.  As mentioned above, I'll be taking a little vacation from BELLE until the sails come in.  With luck, they will be done in mid-March, then there will be some rigging work, and then I'll have her in the water not long thereafter.  Almost exactly a year of part-time work...but who's counting!?!

Wednesday, December 21, 2011

Hoping everyone has a great 2012...plus work on transom and coamings

This will be the last post about Building BELLE for the year, I hope you're enjoyed reading about my progress (or lack thereof) since last March.  I had hoped to have a test-sail in the fall or early winter but will have to settle for an early-Spring launch.  Perhaps a frigid late-January test of the hull, just for "fun"!  We'll see.  In any case, you'll hear about it here, and thank you for your interest in this project.


After considering various options,  I'm using red oak for the coamings.   (White oak or really any other hardwood would be fine too, but I like the look of the red oak.)  I found nice clear boards pretty easily in the size I needed:  14' long by 7" wide.  I planed the boards to 1/2" thick, and here I'm test-bending the first board onto the boat.  I made a pattern using scrap 1/8" luan ply for the coamings and carefully recorded various bevels.  I'm concerned about the board cracking while I do this dry-fit, so I'm NOT bending all the way to the centerline forward.  If I'm feeling lucky, I'll do that next time I work on the boat--2012!--but to be safe I'll probably give the board about 20-30 min in a steam box.  That or possibly just pour boiling water over towels wrapped around the board to get somewhat of the same effect.  Only the first five feet or so need this treatment since the rest of the board easily follows the bend of the side decks.   I'll let you all know how it goes next year!

At the other end of the boat, I'm made a bit of progress.  The rudder hardware is now installed (a couple of copper rivets secure the bottom of the rudder rod to the end of the skeg) and I've drilled for the drains.   These are lined with 7/8" copper pipe just for fun (it would be fine to just epoxy-coat the plywood end grain and leave it at that).  Plus I've painted the ends of the planks on the transom for a traditional look.
So that's it for 2011, as far as BELLE goes.  I hope you all have a great 2012.  I'm pushing to get BELLE's hull done by the end of January, so stay tuned!

Thursday, December 15, 2011

More paint plus progress on the rudder

It's funny how progress seems to be slow slow slow...until you start putting paint on things and the project seems to speed up!  I was going to start on the coamings this week, but I'm expecting to take a look at some nice white oak this Monday so I decided to put it off and keep painting and working on the rudder/tiller/centerboard/etc.


First coat of finish paint on the interior and deck.  It looks awfully green right now!   Once the floorboards, seats, and coamings are in place, actually not much paint will really be visible.  Still, a nice grey/green IMHO.  Notice that the centerboard top is not in place yet.  I'm hoping to have an offcut from making the coamings for that.  That way they'll match nicely.
Another view.  The deck paint is a semi-gloss white with just a smidgeon (OK, an ounce) of the grey-green mixed in.

Here's the aft well...only needs the drain holes now.  See previous post for why there are holes in the bottom cleats...
The rudder hardware is a mix of Dyer gudgeons and upper hanger and a shop-made lower hanger.  I'm about to clean up the lower hanger (which has just been fabricated) and fit it to the end of the skeg.   
I used a router (with a pattern) to inset the upper hanger into the transom.   Here I'm doing a test fit.  I'll have another photo of the final rudder and hardware in place later.  You can see the grain of the Western Red Cedar in this photo.  A couple of more coats of varnish and a couple of summers in the sun and this should "deepen" further into a nice glow.  At least that's what happened on the W.R.C. seats of my previous daysailer.
A quick test-fit of the roughed-out rudder.  I've got it covered in Dynel below the W.L.(actually 1" above the W.L.)  and I"ll be epoxy-coating it above the W.L.  Still to come are the cheeks and tiller.  (The white circle near the bottom is a hole that I'll fill with lead and epoxy to keep the rudder from floating too much.)  Note that I've gone with a simple one-piece rudder rather than the more usual kick-up rudder...I'll discuss this more later.


OK that's it for now, so long!

Monday, December 12, 2011

Finally getting to the coamings...

Christmas draws ever nearer, and I'm trying to get as much done as possible before a week-long break...

At this point, I'm getting to finish work when I can while completing the fabrication of the remaining parts of the hull.  Here's the third coat of varnish on the transom with the yellow pine outboard pad in place.


Had to make the centerboard sometime, so here goes.  It is 3/4" plywood with 'glassed edges.  Later I'll add a small slug of lead to weigh it down a bit and coat the whole thing with epoxy.


Time to make the pattern for the coamings.  As you can see, first I made a temporary jig to hold the bow end of the coamings in place while I made the pattern.  This gives me a chance to eyeball the look of the coamings without cutting any expensive timber.   To make the patter itself,  to start with I scarfed some scrap 1/4" luan plywood together to make a piece about 8"x14'.  With a bit of marking and shaving, I was able to get a pretty good fit to the deck. It's a bit hard to see, but I deliberately made the pattern a couple of inches short at the aft end and then hot-glued a piece of ply to record the exact angle of the transom.  This saves a bit of fitting and shaving.   Once I was happy with the pattern,  I  flopped it over onto the other side of the boat to take a look.   I was glad to note how close it fit to the other side.  Of course, in theory the pattern should fit exactly but sometimes in boat building "stuff happens" and one side of the boat isn't quite the same as the other.  But in this case I can use the same pattern for both sides, hurrah.
I put in the aft well with screws and goo.  Once the goo cures for a few days I'll clean it up with a razor knife.  The unpainted cleats hold the Seagull outboard in place horizontally in the well for when it is not in use on the transom.  They also provide a bit of fore-and-aft stiffness to the bottom of the well (which is 1/4" ply).   The bronze thingamajig is the "quick release" transom mount for the Seagull.

I haven't shown an overall view of the hull in a while, so here it is.  Still a ways to go but starting to look pretty good I'd say!

I'll try to have a final end-of-year post, maybe with some reflections on the project so far, so until then I'll just say à bientôt...

Saturday, December 3, 2011

Completed floorboards and seats plus trying a trolling motor on the transom

Well I hope you all had a good Thanksgiving, I took a week off from boat building--horrors!--to attend to family matters.  This update shows the completed floorboards/seats before sanding/finishing, plus the pad that I've made for clamping the outboard to the transom.  At this point, I think I'm going to put the spars aside for a bit to concentrate on finishing the hull, centerboard, and rudder/tiller.


Here's the roughed-out floorboards and seats in place, glad that's done.  I'll have a photo soon of the floorboards cut up into the various pieces:  there will be a centerline liftout aft of the centerboard trunk and liftouts on either side of the trunk as well.

Here's a test fit of the outboard pad with my old Seagull.  It is a bit smaller than I'd like, but I had a scrap of nice southern longleaf yellow pine that I've been hanging onto just for this piece.  Yellow pine is a hard pine (not soft like white pine) and an excellent boat building wood;  I wish I had more of it. Plus it has a wonderful resiny smell.   A shop with nothing but cedars and yellow pine would smell great!
While I was at it, I borrowed a trolling motor to try that out on the transom.  It is way longer than I need, if I ever buy one I would shorten it by at least 6". 
Good to see the trolling motor easily fits in the well, even a full-length one.  The idea is to convert to electric drive at some point instead of buying a new(er) gas outboard to replace the vernerable Seagull.  A 12V battery under the foredeck, with wires leading through the bilge all the way aft to this well, should do the trick.  A small solar panel on the foredeck would help to keep the battery charged up.  
That's it for now.  I just put the first coat of varnish on the seats, they look pretty good.  I'll have pictures of that--and other work--next time.  I'll be starting on the coamings soon, too, so should be interesting. I'm hoping to get a lot done on BELLE before the Xmas break!  So long.

Friday, November 11, 2011

Making the birdsmouth mast and more

One of the fun things about boatbuilding is next:  spars!  For this boat, I'm making a solid-wood boom and gaff plus a hollow mast (to save on weight aloft).  I decided to go with the "bird's mouth" technique for the hollow mast.  All the spars are made with nice clear Douglas fir.  Why not Sitka Spruce, you ask?  Well, have you seen the price of Sitka Spruce lately?  Also, Doug fir looks very nice varnished--nicer than many types of spruce, in my opinion--and the weight difference won't be significant for this boat I don't think.  Gaffers like BELLE have relatively short masts, so that helps too.  If you want to know more about wood spars, here's a few links:


First I ripped out eight identical strakes on the table saw with the trademark "birdsmouth" on one side.  Since the spar tapers at the top, and a bit towards the butt too, each piece needs to taper as well.   I marked one piece with a batten, rough cut it on a band saw, and planed down to the line.  I then used this master to mark a second piece and cut and planed that one down too.  I then used these two identical "master pieces" (so to speak!) to plane down the remaining six pieces to size.  In this photo, the master pieces are on the outside, separated by spacer blocks from three strakes that I'm planing down to size. As you can see, the plane (a #5) rides on the "masters" and cuts down the inner three strakes.  A couple of passes with a power plane got things started. ( There are various ways of cutting out these strakes...using routers etc...for a small spar like this I'd say this worked quite well.)

I'm going to use pipe clamps to glue up the spar, here's a test run.  I'll double the amount of clamps shown in this photo for the actual glue up.
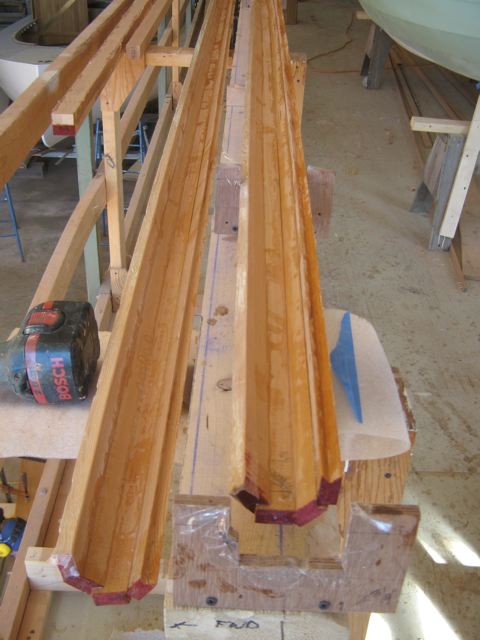
Voila...the glued-up spar.  This is actually Phase One.  A strip of packing tape along two strakes allows me to split the spar open to add blocking...see next photo. To the left of the mast are the "blanks" for the boom--glued from two pieces--and gaff.  I'll eight-side, then 16-side, these the old-fashioned way.  The hollow mast starts out eight-sided, so it only needs to be 16-sided on it's way to becoming round in section.  Then a bit more planing and a bunch of sanding to produce the final tapered, round spars.


With the spar opened up, I'll now shape blocking at the butt, deckline, and top to add stiffness to these areas.  In theory you could do it all in one step...but it seemed easier to do it in two discrete steps.  Once the spar is glued back together, I'll then shape it to 16 sides with planes and then sand it round. 

Meanwhile, I made up this centerboard pin from 3/8" bronze rod.  The plywood discs have pieces of 3/8"-inside-diameter bronze tubing to act as guides.  These will be screwed/glued to the side of the centerboard case.  There are removable brass plates (not shown)  on the outside to hold the pin in place...and keep water from getting in the boat.  There will also be a piece of bonze tubing embedded in the centerboard for the pin to run through.
Here's the discs shown in the last photo being glued to the side of the centerboard case.. I also screwed/glued cleats on each side of the case, towards the top.  These cleats line up with the tops of the seats and will allow me -- if all goes well -- to have lift up floorboards.  To make a (relatively) large "sleeping platforn",  the forward floorboards will fill in the space between the side bench seats and the centerboard case, resting on these cleats.  Not clear?  Well I'll be working on that in a bit, more photos to come...
Finally, after much hand-wringing, I finally cut down the transom!   This changes the whole look of the aft end of theboat...and I have to say I'm happy I did it.  Yes, that's a 35-yr-old British Seagull Forty Plus hanging there...my father bought it new years ago...and it actually runs!  There's a temporary piece of plywood clamped to the transom to protect it from scratches.  I have a nice block of yellow pine that I'll use as the final outboard clamping block.  To be honest, I may buy a more, umm, modern outboard at some point.  But the ol' Seagull will be the Official Power on launch day, that's for sure.

Next time:  more work on the spars plus maybe get started on the floorboards and seats.  Until then, good night and have a pleasant tomorrow.

Wednesday, April 6, 2011

Plank laps and just a bit of varnish...

With the setup faired up reasonably well, I made up six battens about 16-17' long to lay out the plank lines.  On a lapstrake boat like Belle, these will show up strongly, so I wanted them to be nice and fair.  Plus I threw a quick coat of thinned varnish on the transom to protect it a bit from spills and hand prints etc.  Western Red Cedar is very soft and soaks up any kind of liquid like a sponge.  I think I'll add a second coat later too, just in case.

I'm really anxious to get planking, especially now that I've "seen" the planks using my battens!  But...sigh...I'd really like to get a couple of more items in place beforehand:  the centerboard case, sheer clamp, and a full-length seat riser about 6" above the waterline.  In theory I could put these into the boat after the boat is planked and flipped right-side-up, but I figured it would be easier to get them in place now.  Someday--sooner rather than later, I hope--I'll finish off the plans and post a copy here.  Then I'll be able to refer readers directly to the plans when I write something like "seat riser about 6" above the waterline".

Once I had the transom shaped on one side, I took it off and cut the other side to match.  To do that I recut the original transom pattern to the new shape.  Shaping pretty much by eye--but using battens to make sure everything looked fair--my "new and I hope improved" transom is slightly fuller than that drawn in my original plans.  I'm keeping the revised transom pattern, which I'll use to update the plans later.


A first coat of varnish really soaks into the Western Red Cedar...actually dry in spots.  A few more coats and this should have a nice glow.  My last boat had WRC thwarts and I thought they looked great.  It is a very soft wood, however, and shows every ding and scratch.


Here I'm tweaking the battens to determine the plank laps.  The battens are 1/2" thick by 1" wide.  My plank laps will be 1" wide--in other words, there will be 1" of overlap between one plank and the next-- so the battens show exactly where each lap will be on the final boat.  Once I was happy with the plank locations, I marked each mold and the stem and transom for each lap.  A sharp eye will tell that the sheer plank--the lowest one in this photo--is slightly wider than the rest.   This is because the final boat will have a half-round to protect the sheer.  I added width to the sheer plank so that it would appear to be the same width as the other planks once the half-round is added.   


A Bosch fan??  I guess so!


The bottom will be made up  of a 3/8"-thick panel and a 1/4"-thick panel epoxied together for a total thickness of 5/8".  The reason I'm not just using 5/8" plywood is I want to bend the plywood to the shape of the transom, and I figure 5/8" would be just too stiff for that. Or at least very difficult.  Dimensions came from the lofting.  The aft end of the panels (the end closest to you in this photo) look to be quite wide, but the aft end of the boat will be heavily shaped once everything is glued up on the boat.

The next steps are:  building the centerboard case (including a pattern for the centerboard) and notching the molds for the sheer clamp and seat riser.  Ripping out said sheer clamps and risers from Douglas fir and installing into the notches, ready (finally!) for planking.

Sunday, March 27, 2011

Design vs. Build

I did quite a bit of work on my plans this last week, but I also made one reasonably important discovery:  once I really looked at the stern of the boat "in real life" I wasn't all that happy with the shape of the transom as I originally drew it.  So I decided to change it on the boat.  At first I hesitated, but then I reminded myself that's it's my design... I don't think Captain Nat is going to spin in his grave! There's a photo of the process below, but basically what happened is I cut one side of the transom roughly to shape and used battens to fair it into the setup until I was happy with the shape.  Next week, I'll modify my original transom pattern to the new shape then use the pattern to cut other side of the transom.  Finally, I'll note the revised shape--I already have waterlines and buttocks marked on the back side of the transom so taking off the new measurements will be easy--and revise the plans and Table of Offsets.


Originally, I was going to go with a simple painted transom, but I found some Western Red Cedar 1/8" veneers and decided to laminate them to the 3/4" plywood transom.  Here's the glue up.

I started fairing the setup using 16' battens made from straight-grained fir (no carbon this time!) about 1/2"x 1".

I'm hoping to make the planking and bottom from two sheets of 3/8" meranti plywood scarfed together (shown here) plus two sheets of 1/4".  The 3/8" will be used for the bottom and garboards, the 1/4" for the rest of the planking.  I was hoping to use only domestic woods in the boat, but it's tough to find decent marine fir plywood these days so I decided to go with the meranti.  It is heavier than occume, but it has the reputation of being more rot-resitant.  And cheaper.

Here's the transom mounted to the setup.  What I ended up doing is using my transom pattern on only one side of the transom, leaving the other side uncut.  After running battens through the aft section of the boat, I wasn't 100% happy with the shape of the transom as drawn.  So what I'm doing here is shaping one side of the transom until I like it.  Once that's done, I'll transfer the shape back to my pattern and cut the other side.  Also, note the change on the plans and Table of Offsets.

I also cut the inner stem to length and mounted it to the setup.  Yet to come is to bevel the edges so that the planking can be screwed and glued to the stem.

Saturday, March 12, 2011

STM (Stem, Transom, Molds)

O. K. come in.  With the lofting done (see last post), it's time to start planking.  OK not quite, but at least it's time to finish the  things that need to be done just before planking, so that's good enough for now.  Specifically, figure out what the "setup" will look like and build the various pieces that go into it.  The setup is the structure on which the hull is built, upside-down in this case, like most small boats.  This week I'm looking to put together patterns for the stem and transom plus a bunch of transverse molds that when attached to the building jig--or strongback, which I hope to make next week--will determine the shape of the hull as it is planked up.  Planking can then actually begin.  Then time for a sail...and drinks on the aft deck...holystoned daily by the crew...but I digress!


Using information from the lofting, I lay out a full-size pattern of the transom--actually just the starboard side of the transom--on a piece of hardboard painted white.  Why only the starboard side?  One reason is it is just easier to make one side only, then flop the pattern over to the port side to mark out the whole transom.  Since the transom should be bilaterally symmetrical, it also eliminates errors in drawing the shape on both the port and starboard sides.  

With the transom pattern drawn up, it's time to draw up a full-sized stem pattern using my fancy carbon fiber batten.  Feel free to use a straight-grained wood batten for your boat...carbon just breaks less, that's all!


Here the laminated fir inner stem is being epoxied using a form screwed to the shop floor...already no room on the workbench.  I used the cut-out stem pattern to make the form and used lots of clamps, of course.  Note that I've wrapped the whole stem with plastic to lessen the mess.  This will easily peel off when the glue dries.


Here's the  glued-up inner stem "blank", cleaned up a bit, laying on top of the stem pattern.  As you can see, the fit looks pretty good along the inside edge.  There's just the little "tail" of the pattern showing at the top of the picture:  I'll glue on a piece later.  Later, I will also do final shaping (cut off the ends to shape etc.) and glue up the outer stem.  It's a bit more time, but in this case I decided to glue up the inner stem first, check it against the pattern to see if there was much spring back (there wasn't), then glue up the outer stem.


Molds

With the stem glued up and the transom pattern drawn (I'll use it to cut out the transom from mahogany marine plywood next week), I next turn to the molds.  (Confused?  Here's a good picture of what a completed setup with molds looks like.  The completed setup for Belle will look similar.) This boat will have seven transverse molds, one for each station line in the design.  An experienced reader of this blog might ask, "why build a bunch of molds, which will not wind up in the final boat, when you can just build whatever plywood bulkheads you need and wrap the boat around that?"  Since Belle is the prototype of a new design, I decided to build a complete set of molds.  This will allow me complete freedom to fair the setup before cutting into a single sheet of expensive marine mahogany plywood.  In addition, unlike some designs, this boat will have few plywood molds in the final boat so there will not be time savings there.  Finally, I will save the molds for later use.

Like the transom pattern, we only have one side of the boat on our body plan for each station. But not too difficult to  cut two identical pieces of mold stock and line them up with the various waterlines and buttocks (yes, buttocks, but don't worry, it's all very serious). 
The time-honored "nail" technique was used for transferring the shape of each station to the mold stock.  First, nail heads are lightly tapped into the plywood body plan.  Next, mold stock is layed on top of the plan.  Finally, a few whacks with the hammer, and a stomp or two for good measure, and the nails leave a clear impression in the soft pine mold stock.  No need to "connect the dots" with a line, you can go right to the bandsaw to cut out the shape.  A sharp eye will note that the nails are not lined up with the lines on the body plan, so what gives?  The body plan is drawn to the outside of the planking.  Since the molds are inside the planking, you need to deduct the thickness of the planking to arrive at the final mold shape.  In this case, the planking will be 1/4" thick, actually 6mm since the plywood is imported.  The bottom will be 5/8" thick;  the garboards will be 3/8". 
The completed mold for station six being checked against the body plan.  I've put the plan on the floor, but feel free to work on yours at bench height, much more comfortable.
I was hoping to finish all the molds this week but, alas, I'm two short.  Still, you can start to see the shape of the boat from the molds.  
Until next time,  À bientôt, j'espère.