- There's a good discussion of how to dimension small-boat spars in William Garden's The Making of Tom Cat. He uses the small catboat Tom Cat as an example, giving numbers for both Doug fir and spruce and hollow vs. solid spars.
- I used the Birds' Mouth Spar Size Calculator to figure out the dimensions of the staves...many thanks to Clint Chase for posting this!
- Skene's Elements of Yacht Design also has good information about wood spars.
 |
| First I ripped out eight identical strakes on the table saw with the trademark "birdsmouth" on one side. Since the spar tapers at the top, and a bit towards the butt too, each piece needs to taper as well. I marked one piece with a batten, rough cut it on a band saw, and planed down to the line. I then used this master to mark a second piece and cut and planed that one down too. I then used these two identical "master pieces" (so to speak!) to plane down the remaining six pieces to size. In this photo, the master pieces are on the outside, separated by spacer blocks from three strakes that I'm planing down to size. As you can see, the plane (a #5) rides on the "masters" and cuts down the inner three strakes. A couple of passes with a power plane got things started. ( There are various ways of cutting out these strakes...using routers etc...for a small spar like this I'd say this worked quite well.) |
 |
| I'm going to use pipe clamps to glue up the spar, here's a test run. I'll double the amount of clamps shown in this photo for the actual glue up. |
 |
| Voila...the glued-up spar. This is actually Phase One. A strip of packing tape along two strakes allows me to split the spar open to add blocking...see next photo. To the left of the mast are the "blanks" for the boom--glued from two pieces--and gaff. I'll eight-side, then 16-side, these the old-fashioned way. The hollow mast starts out eight-sided, so it only needs to be 16-sided on it's way to becoming round in section. Then a bit more planing and a bunch of sanding to produce the final tapered, round spars. |
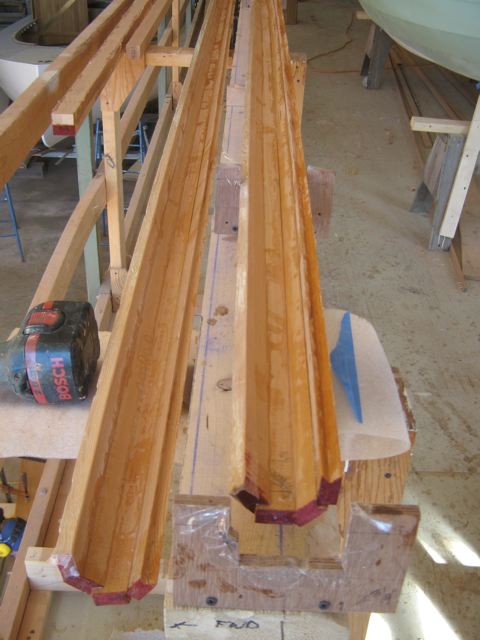 |
| With the spar opened up, I'll now shape blocking at the butt, deckline, and top to add stiffness to these areas. In theory you could do it all in one step...but it seemed easier to do it in two discrete steps. Once the spar is glued back together, I'll then shape it to 16 sides with planes and then sand it round. |
 |
| Meanwhile, I made up this centerboard pin from 3/8" bronze rod. The plywood discs have pieces of 3/8"-inside-diameter bronze tubing to act as guides. These will be screwed/glued to the side of the centerboard case. There are removable brass plates (not shown) on the outside to hold the pin in place...and keep water from getting in the boat. There will also be a piece of bonze tubing embedded in the centerboard for the pin to run through. |
 |
| Here's the discs shown in the last photo being glued to the side of the centerboard case.. I also screwed/glued cleats on each side of the case, towards the top. These cleats line up with the tops of the seats and will allow me -- if all goes well -- to have lift up floorboards. To make a (relatively) large "sleeping platforn", the forward floorboards will fill in the space between the side bench seats and the centerboard case, resting on these cleats. Not clear? Well I'll be working on that in a bit, more photos to come... |
 |
| Finally, after much hand-wringing, I finally cut down the transom! This changes the whole look of the aft end of theboat...and I have to say I'm happy I did it. Yes, that's a 35-yr-old British Seagull Forty Plus hanging there...my father bought it new years ago...and it actually runs! There's a temporary piece of plywood clamped to the transom to protect it from scratches. I have a nice block of yellow pine that I'll use as the final outboard clamping block. To be honest, I may buy a more, umm, modern outboard at some point. But the ol' Seagull will be the Official Power on launch day, that's for sure. |
Next time: more work on the spars plus maybe get started on the floorboards and seats. Until then, good night and have a pleasant tomorrow.


